2024-07-10

Changing a Picture in Microsoft Visio

Visio doesn't give you a built in way to change the picture that you've added to a diagram to another picture. But with some VBA code, you can perform the task.

First, you will need to add the code below. Press Alt+F11 on the keyboard to open the Visual Basic Editor. Click Insert > Module from the menu. Paste the code below into the module. Save your drawing as a Visio Macro-Enabled Drawing (with a .vsdm extension).

Then to change a picture to another picture, select it. Then press Alt+F8 to open the macros dialog. Select ChangePicture from the dialog and click Run. A dialog will open asking you for a file. Select the file and click OK. The picture will change without losing things such as connections to the picture.

Most of the code is just to open the dialog to ask for the filename. The main  task is to call the shape's ChangePicture method.


Option Explicit

Private Declare PtrSafe Function GetOpenFileName _
    Lib "comdlg32.dll" _
    Alias "GetOpenFileNameA" ( _
    pOpenfilename As OPENFILENAME) As Long

Private Declare PtrSafe Function CommDlgExtendedError _
    Lib "comdlg32.dll" () As Long

Private Type OPENFILENAME
    lStructSize         As Long
    hwndOwner           As LongPtr
    hInstance           As LongPtr
    lpstrFilter         As String
    lpstrCustomFilter   As String
    nMaxCustFilter      As Long
    nFilterIndex        As Long
    lpstrFile           As String
    nMaxFile            As Long
    lpstrFileTitle      As String
    nMaxFileTitle       As Long
    lpstrInitialDir     As String
    lpstrTitle          As String
    flags               As Long
    nFileOffset         As Integer
    nFileExtension      As Integer
    lpstrDefExt         As String
    lCustData           As LongPtr
    lpfnHook            As LongPtr
    lpTemplateName      As String
    '#if (_WIN32_WINNT >= 0x0500)
    pvReserved          As LongPtr
    dwReserved          As Long
    FlagsEx             As Long
    '#endif // (_WIN32_WINNT >= 0x0500)
End Type

Private Const OFN_READONLY = &H1
Private Const OFN_OVERWRITEPROMPT = &H2
Private Const OFN_HIDEREADONLY = &H4
Private Const OFN_NOCHANGEDIR = &H8
Private Const OFN_SHOWHELP = &H10
Private Const OFN_ENABLEHOOK = &H20
Private Const OFN_ENABLETEMPLATE = &H40
Private Const OFN_ENABLETEMPLATEHANDLE = &H80
Private Const OFN_NOVALIDATE = &H100
Private Const OFN_ALLOWMULTISELECT = &H200
Private Const OFN_EXTENSIONDIFFERENT = &H400
Private Const OFN_PATHMUSTEXIST = &H800
Private Const OFN_FILEMUSTEXIST = &H1000
Private Const OFN_CREATEPROMPT = &H2000
Private Const OFN_SHAREAWARE = &H4000
Private Const OFN_NOREADONLYRETURN = &H8000&
Private Const OFN_NOTESTFILECREATE = &H10000
Private Const OFN_NONETWORKBUTTON = &H20000
Private Const OFN_NOLONGNAMES = &H40000          '  force no long names for 4.x modules
Private Const OFN_EXPLORER = &H80000             '  new look commdlg
Private Const OFN_NODEREFERENCELINKS = &H100000
Private Const OFN_LONGNAMES = &H200000           '  force long names for 3.x modules

Private Const OFN_SHAREFALLTHROUGH = 2
Private Const OFN_SHARENOWARN = 1
Private Const OFN_SHAREWARN = 0

Private Const CDERR_DIALOGFAILURE = &HFFFF&

Private Const CDERR_GENERALCODES = &H0
Private Const CDERR_STRUCTSIZE = &H1
Private Const CDERR_INITIALIZATION = &H2
Private Const CDERR_NOTEMPLATE = &H3
Private Const CDERR_NOHINSTANCE = &H4
Private Const CDERR_LOADSTRFAILURE = &H5
Private Const CDERR_FINDRESFAILURE = &H6
Private Const CDERR_LOADRESFAILURE = &H7
Private Const CDERR_LOCKRESFAILURE = &H8
Private Const CDERR_MEMALLOCFAILURE = &H9
Private Const CDERR_MEMLOCKFAILURE = &HA
Private Const CDERR_NOHOOK = &HB
Private Const CDERR_REGISTERMSGFAIL = &HC

Private Function GetFileName() As String
    Dim lngResult As Long
    Const MAX_BUFFER As Long = 250

    Dim OFN As OPENFILENAME

    With OFN
        .lpstrFilter = "All Files (*.*)" & vbNullChar & "*.*" & vbNullChar
        .nFilterIndex = 1
        .lpstrFile = Space$(MAX_BUFFER - 1) & vbNullChar
        .nMaxFile = Len(.lpstrFile)
        .lpstrFileTitle = Space$(MAX_BUFFER - 1) & vbNullChar
        .nMaxFileTitle = Len(.lpstrFileTitle)
        .lpstrInitialDir = "C:\"
        .flags = OFN_FILEMUSTEXIST Or OFN_PATHMUSTEXIST
        .lStructSize = LenB(OFN)
    End With

    lngResult = GetOpenFileName(OFN)

    If lngResult <> 0 Then
        GetFileName = Left$(OFN.lpstrFile, InStr(1, OFN.lpstrFile, vbNullChar) - 1)
    Else
        GetFileName = vbNullString
    End If
End Function

Public Sub ChangePicture()
    Dim strFileName As String
    Dim shp As Shape
    
    ' Ensure a shape is selected
    If Application.ActiveWindow.Selection.Count = 0 Then
        MsgBox "Please select a shape first."
        Exit Sub
    End If
    
    strFileName = GetFileName()
    If Len(strFileName) > 0 Then
        Set shp = Application.ActiveWindow.Selection.PrimaryItem
        Call shp.ChangePicture(strFileName)
    End If
End Sub

2024-06-19

Getting a Microsoft Publisher Style Color to Stick

In Microsoft Publisher, If you try to set a font color in a style, it won't seem to save. If you change the color, it will look like it saved, but if you close the file, open it again, the color will have reset to black. The trick to getting it to actually save is to change both the fill color and the outline color. Follow these steps:

  1. Click Home > Styles > Styles
  2. Right click on the style you want to change
  3. Click the "Text effects..." button
  4. Click the Text Fill & Outline button at the top
  5. Set the Text Fill to the Solid fill option
  6. Pick your color
  7. Set the Text Outline to the Solid line option
  8. Pick the same color
  9. Click OK

Now your color will save to the style.


2024-04-22

How to Move a Window When You Can't Click on the Title Bar

This is a little tip for how to move a window when, for some reason, the title bar is off the top of the screen. This can happen when  you change screen resolutions or have a window on a second monitor that is no longer available and the window gets moved to the main monitor. The trick is to click Alt+<Space>, M, then use the arrow keys to move the window.

If you went back many years ago, the application menu icon in the upper left of the window used to look like a minus sign. It now shows the application icon. Except that wasn't a minus sign, it was a picture of the space bar on the keyboard. Nobody, not even the programmers at Microsoft, got the reference that Alt+<Space> activates the application menu. M is the access key for Move. Once Move is activated, the arrow keys become active to move the window.

2024-02-09

Where Does Office Store the Most Recently Used List?

Where does Microsoft Office save the Most Recently Used list for Word, Excel, etc.? The answer is in a file under this directory:

C:\Users\UserName\AppData\Local\Microsoft\Office\VersionNumber\MruServiceCache

There will be a directory under that that is randomly generated, then under that is the product name. Then under that is a file with the name Documents_en-US (or whatever the language). That file is a JSON file that has the list in it.

2022-11-07

The Correct Way to Handle Multiple Exceptions in C#

This is just a quick article on the correct way to handle multiple exceptions with the same code in C#. In older versions of C#, one way to handle multiple exceptions was code like this:


    try
    {
        // Code that can fail
    }
    catch (IOException)
    {
       // Failure code A
    }
    catch (ArgumentException)
    {
       // Failure code A
    }

This violates this violates the DRY (Don't Repeat Yourself), concept with Failure code A being repeated. Yes, you can call a method (or even a lamda function) from the failure code, but that creates code that is elsewhere for something that should be handled here. Another attempt would be something like this:


    try
    {
        // Code that can fail
    }
    catch (Exception ex)
    {
        if (ex is IOException || ex is ArgumentException)
        {
            // Failure code A
        }
        else
        {
            throw;
        }
    }

This is better (and the right way in C# before version 6), but it is clumsy. Incidentally, in this code, it would be important to use just throw, not throw ex as C# does not treat them the same. Using just throw preserves the stack trace so that the call stack shows the origination of the exception, whereas throw ex shows the exception originating in this code.

Here is the right way to handle it with current versions of C#:


    try
    {
        // Code that can fail
    }
    catch (Exception ex) when (ex is IOException or ArgumentException)
    {
        // Failure code A
    }

Incidentally, the convention in C# is to use "ex" as the variable for exceptions, as "e" is used for the second argument in event handlers, and if you have exception handling code in an event handler, you don't want them to conflict.

2021-11-10

Excel Bug Changes Color on Cell Not in Range

I'm in the process of writing an Excel add-in, using the relatively new mechanism of writing a TypeScript library. I had previously written this Excel add-in in C# on .NET Framework 4.8, but this mechanism doesn't work in .NET 5 or 6 for architectural reasons. (With a bunch of tricks, I got Excel calling .NET 5 code configured as a COM DLL, but it won't work if the user's machine is configured in some ways and I couldn't get the add-in recognized correctly.) The TypeScript actually calls a web API that then calls the C# on the server side, so this wasn't a rewrite from the ground up but a layer thrown on top of my previous code, but Excel never sees that. From Microsoft's perspective using JavaScript has the advantage that it is portable, meaning that these add-ins can work on Windows, iOS, the web, phones, or anywhere else that Microsoft can place Excel.

TypeScript is a language that adds strongly typed features to JavaScript. It compiles into JavaScript, so it works anywhere that JavaScript does. I dislike weakly typed languages like JavaScript, so TypeScript makes JavaScript acceptable.

So in the process of writing my add-in, I ran into a bug in the Excel Javascript/Typescripts APIs. I formatted cells A6:A11 to have a blue background, and oddly enough, cell A13 turned blue as well. I don't know what the internals of the Javascript API or Excel look like, but this bug is really strange, as it seems to be dependent on the data that is in a formatted cell. In any case, I reduced the code to a small easily reproducible case, wrote it up, and submitted it to Microsoft. They confirmed the bug the same day I submitted it and have assigned it to a developer.

More info: It turns out that this is not a Javscript API bug. It is a design flaw in Excel. If you format the backcolor of three or more cells (doesn't happen with two), say A6:A8, then change a cell within three cells, say A11, it will also change color. This came back as BY DESIGN. What a stupid design. It is unfathomable to me that this is what a user would want or expect.

Here is some equivalent VBA code (press Alt+F11, double-click on Sheet1, insert the code, press F5 to run it):

  Public Sub ExcelBug()
    Sheet1.Range("A1:A3").Interior.Color = vbBlue
    Sheet1.Range("A1").Value = "a"
    Sheet1.Range("A2").Value = "b"
    Sheet1.Range("A3").Value = "c"
  End Sub
  
Run the code. Now type anything into cell A5 and press enter. What do you think...should the backcolor change to be blue? Well, it does. Now delete the value and change the backcolor to be no fill. Add the following line just before the End Sub:
      Sheet1.Range("A5").Value = "d"
  
Now run the code. A5 doesn't change to be blue. Now delete the value and type it again. No blue. What are the rules on when it will change to be blue? Now put the same data into Excel on the web. Will it be blue or not? Answer: not. Regardless of whether they claim it is by design, this is a bug.

2021-11-01

Microsoft Access Combo Box Search While Typing

If you start typing in a Microsoft Access combo box, it might not search as you type. I eventually figured out the trick to making the search work. The problem occurs when the combo box is based on a query. For the query to work, it must be a DISTINCT query. In other words, if you go to SQL View (select View SQL from the ribbon), and the query is:

SELECT tblCategory.pcCategoryId, tblCategory.strCategory
FROM tblCategory
ORDER BY tblCategory.strCategory;

Change it to:

SELECT DISTINCT tblCategory.pcCategoryId, tblCategory.strCategory
FROM tblCategory
ORDER BY tblCategory.strCategory;
After that the search while typing should work.

2021-05-13

Displaying an Image in a Microsoft Access Image Control

If you have a column in a Microsoft Access table that has the name of an image that refers to a file on the disk, you can update an image control in either a form or report with the code below. Put this code into a standard VBA module that you create with Insert Module from the menu. This code assumes that all the images are in a subdirectory of the location of the database called "images" if there are relative paths to the image file.

Public Const strImageFolder = "images"

Public Sub DisplayImage(ctlImageControl As Control, strImagePath As Variant)
    On Error GoTo ErrorHandler
    
    If IsNull(strImagePath) Then
        ctlImageControl.Visible = False
    Else
        If InStr(1, strImagePath, "\") = 0 Then
            strImagePath = Application.CurrentProject.Path & "\" & strImageFolder & "\" & strImagePath
        End If
        ctlImageControl.Visible = True
        ctlImageControl.Picture = strImagePath
    End If
    Exit Sub
ErrorHandler:
    Select Case Err.Number
        Case 2114 'Doesn't support the format of the file
            ctlImageControl.Visible = False
        Case 2220 ' Can't find the picture.
            ctlImageControl.Visible = False
        Case Else  ' Some other error.
            MsgBox "Unexpected Error #" & Err.Number & " " & Err.Description, vbExclamation, "Unexpected Error"
    End Select
End Sub

To use this code in a form, if the control that contains the image name txtPicture and the image control is named imgPicture then add this code to the module for the form:

Private Sub Form_AfterUpdate()
    Call DisplayImage(Me!imgPicture, Me!txtPicture)
End Sub

Private Sub Form_Current()
    Call DisplayImage(Me!imgPicture, Me!txtPicture)
End Sub

Private Sub txtPicture_AfterUpdate()
    Call DisplayImage(Me!imgPicture, Me!txtPicture)
End Sub

To use it in a report, assuming there is a column in the table or query the report is based on called strPicture and an image control named imgPicture, add this code to the report:

Private Sub Detail_Print(Cancel As Integer, PrintCount As Integer)
    Call DisplayImage(Me!imgPicture, Me!strPicture)
End Sub

Open a URL using VBA

This is just a quick tip on opening a hyperlink using the default browser in VBA. It uses the ShellExecute Windows API call. Call the OpenHyperlink function shown below with the URL that you want to open.

Private Declare PtrSafe Function ShellExecute Lib "shell32.dll" Alias "ShellExecuteA" ( _
  ByVal hWnd As Long, _
  ByVal lpOperation As String, _
  ByVal lpFile As String, _
  ByVal lpParameters As String, _
  ByVal lpDirectory As String, _
  ByVal nShowCmd As Long _
  ) As Long

Public Function OpenHyperlink(ByRef strHyperlink As String) As Long
    OpenHyperlink = ShellExecute(0, "Open", strHyperlink, vbNullString, vbNullString, vbNormalFocus)
End Function

An example of calling it is:

Call OpenHyperlink("http://blog.xoc.net")

2021-05-09

Extracting Microsoft Access OLE Object Field Items

I created a Microsoft Access database for a small set of data (<1000 rows). Access was a perfect database for this particular problem, allowing easy input and good reporting, and the Access accdb database format allows easy installation on different computer that have Access. However, I made a mistake in storing bitmaps in an OLE object column. Access still has a limit of two gigabytes for its native database format. Bitmaps don't compress and quickly consume all of that limit. I had entered several hundred items before running into that limit. The two gigabyte limit was reasonable in the 1990s when a 1 gigabyte drive cost over $1000 (I have a receipt!), but is ridiculously small by today's standard.

The VBA code below works on the table tblExample. It extracts the bitmap from an OLE Object column (olePicture) and writes it to a file on the disk. It then updates another column (strPicture) with the name of the file it wrote. The filename is constructed by the name of the primary key field (ID) followed by .bmp, thus ID of 1 becomes 1.bmp in the same directory as the database.

An OLE Object field has a Package Header, an OLE header, the actual data of the bitmap, some optional other stuff, and an OLE footer. The problem is that the headers are variable length with sizes embedded into them, so the actual bitmap has to be located within the data before it can be extracted. So this code extracts the sizes and skips to the appropriate place and extracts the data. It uses a helper function that constructs a long from the first four bytes of an array of bytes (although it will break if a size is over 2^31 as it would try to convert an unsigned count to a signed count, which should never happen here).

After running this code successfully (use the Windows File Explorer to view the bitmaps), the OLE Object column can be deleted. Other VBA code will be necessary to display the picture in the external file, which is beyond the scope of what I want to show here. The code is not very fast as it writes the file one byte at a time, but it should be a one-time thing, at least for my purpose. It also probably has some boundary conditions related to some kinds of OLE objects that break it under some conditions, but it worked for what I needed.

Option Compare Database
Option Explicit

Public Sub ExtractImages()
    ' Need a reference to the Microsoft ActiveX Data Objects 6.1 Library
    Dim rst As ADODB.Recordset
    Dim varByte As Variant
    Dim i As Long
    Dim lngLength As Long
    Dim byteVal As Byte
    Dim strFileName As String
    Dim strFilePath As String
    
    Set rst = New ADODB.Recordset
    rst.Open "tblExample", CurrentProject.Connection, adOpenDynamic, adLockOptimistic
    Do While Not rst.EOF
        If Not IsNull(rst.Fields.Item("olePicture").Value) Then
            ' Create the filename from the primary key ID field.
            strFileName = rst.Fields.Item("ID").Value & ".bmp"
            
            ' Fill strPicture with the filename
            rst.Fields.Item("strPicture").Value = strFileName
            rst.Update
            
            strFilePath = Application.CurrentProject.Path & "\" & strFileName
            If Dir(strFilePath) = "" Then
                ' Read the package header the package header, the second byte is the size
                varByte = rst.Fields.Item("olePicture").GetChunk(3)
                
                'Extract the offset to the start of the OLE header
                varByte = rst.Fields.Item("olePicture").GetChunk(varByte(2) + 5)
                
                'Get the first four bytes which holds the OLE size
                varByte = rst.Fields.Item("olePicture").GetChunk(4)
                
                ' Use to size to of the header to move to the end of the header
                varByte = rst.Fields.Item("olePicture").GetChunk(GetLong(varByte))
                
                ' Skip the next eight bytes
                varByte = rst.Fields.Item("olePicture").GetChunk(8)
                
                ' The next four bytes retrieves the size of the Bitmap
                varByte = rst.Fields.Item("olePicture").GetChunk(4)
                
                ' Turn those bytes into a length
                lngLength = GetLong(varByte)
                
                ' Get the bitmap
                varByte = rst.Fields.Item("olePicture").GetChunk(lngLength)
                
                ' Write the bitmap to the file
                Open strFilePath For Binary As #1
                For i = 0 To lngLength - 1
                    byteVal = varByte(i)
                    Put #1, , byteVal
                Next i
                Close #1
            End If
        End If
        rst.MoveNext
    Loop
    rst.Close
    Set rst = Nothing
    MsgBox "Done"
End Sub

Public Function GetLong(ByRef varByte As Variant) As Long
    ' Convert the first four bytes of varByte into a long
    Dim i As Long
    Dim lngResult As Long
    
    For i = 3 To 0 Step -1
        lngResult = lngResult * 256 + varByte(i)
    Next i
    GetLong = lngResult
End Function

2021-03-22

What Does the "Home" Key Do in Microsoft Editors?

I want to give a little anecdote on how I changed how people program. It was some time around 1990, maybe plus or minus a year. I was working on the Microsoft Access programming team at Microsoft. Actually they still hadn't settled on a name yet and eventually stole the name of a communications product Microsoft had shipped earlier and re-used it for their database, but I digress. I spent the majority of my hours in the buildings at Microsoft. My friends also worked at Microsoft, so when I wasn't working, I'd frequently head over to their office and just hang out. We all worked long hours.

One of my friends there was a programmer named Richard. Richard ostensibly worked on the database engine side of Microsoft Access, whereas I was on the user-interface side, but Richard had kind of "god-level" access to all of the code across Microsoft's Application Division. Anything that wasn't part of the operating system at Microsoft, he was authorized and trusted to go in and change.

I was sitting in Richard's office one night, and he said there had been a debate on what the "Home" key should do in Microsoft's editors. One camp said it should go to the beginning of the line. The other camp said it should go to the first non-whitespace character on the line, after any spaces or tabs. He asked, "what do you think it should do?" I said, "what if the first time you pressed it, it went to the first non-whitespace character, but if you were already there, it went to the start of the line?" He said, "that's a good idea!" And as I sat there, he went in and changed the code in Visual Studio and the Visual Basic editors. Try it, because it still does that today.

Now this was kind-of the dark ages in software development. Microsoft was just putting its first usability testing groups together, so today you'd probably do some usability tests to see if that really worked for people. Or at least have a meeting about it. But I just happened to be in the right place at the right time, with the right programmer with the right access and skills. I got asked the question on what I thought it should do and everyone else gets to live with it for all time.

2021-02-12

Calling a .NET 5 (.NET Core) COM DLL from Microsoft Office (Excel, Word, Outlook, etc.)

I have finally got a .NET 5 DLL written in C# able to be called from Microsoft Office! This process actually works for any application to call the DLL through COM.This has been a bear to figure out. It is not easy, but it can be done. There are some mentions of the process on the web, but I have seen no examples. I am going to post the code on GitHub with a sample project, and the full description over there.

So before launching into the process, here is my most basic recommendation. If possible, for the time being don't use .NET 5 or .NET Core at all. Use the .NET Framework 4.x, because it does much of the work for you. For my current project, that wasn't possible, because a library it needed to call was only going to be maintained on .NET 5, as it was also being called from at .NET 5 front end. This recommendation will likely change as the .NET core does the work of providing a type library in the comhost file they create in some future release.

But here is the basic process: 1) Create a project with a class and interface. 2) Decorate them with appropriate attributes. 3) Add the appropriate method and the commands to create the correct registry entries to the project. 4) Add the appropriate settings to project file. 5) Build the DLL. 6) Create a parallel IDL file that describes the interface. 7) Compile it with the MIDL compiler. 8) Register the DLL. 9) In office, add a reference to the DLL.

There are various gotchas in this process. One of the things that is tricky is making sure that your DLL, the comhost wrapper, and the version of Microsoft Office you are calling it from all have the same bitness (32 bits or 64 bits).

So given all that, you can find the test project with more detailed documentation here: https://github.com/GregReddick/ComTestLibrary/tree/master/ComTestLibrary1

2021-01-24

Solving Mastermind

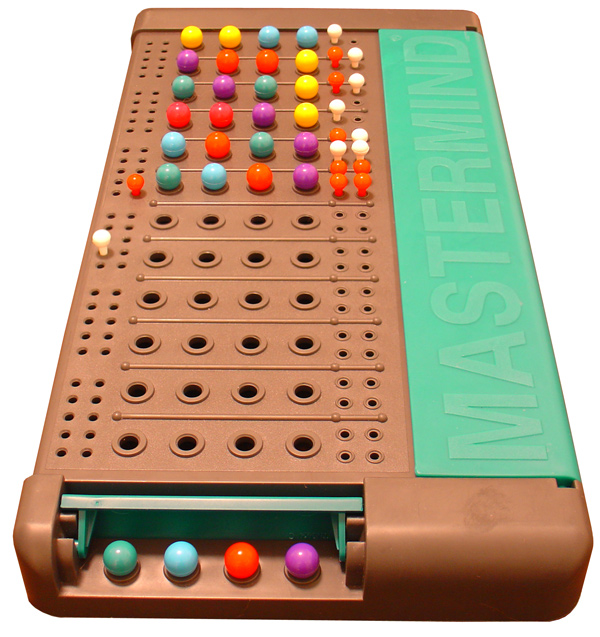
A question was posted online recently about the best strategy for winning the game of Mastermind. Mastermind is a game played between two players, a Code Maker and a Code Breaker. The Maker makes a code of colored pegs, and the Breaker has to guess the code. After each guess, the Maker gives feedback of how many of the pegs were the right color in the right place and how many are the right color in the wrong place, indicated by black and white pegs in the board. The Breaker then makes another guess.

The parameters of the game are how many possible colors there are, how many pegs are in the code, and whether the same color is allowed to be repeated in the code, as in (4 of 6, repeats).

Donald Knuth wrote a paper on optimal play for the Breaker and showed that in four pegs in the code of six possible colors with repeats, it can be solved in no more than five tries. Donald Knuth is a deity of Computer Science, having written The Art of Computer Programming. I wrote a program to implement Knuth's algorithm in C#. It also creates a table at the end of how to make perfect play.

In my program, I replace colors with numerals since the colors are arbitrary. I have placed the code on GitHub. You can try the suggested algorithm on this site.

The program uses a MinMax algorithm, which finds the code that will reduce the number of possible remaining codes on each play. Because of the way it works, sometimes it will make a code that might not actually solve it on the next play, but instead guarantee that it solves it in the least number of tries. There are some other algorithms that will solve it in a smaller average number of tries, but possibly having a larger maximum.

2020-06-17

Creating a Break Timer in PowerPoint using VBA

When I teach live classes, I use the SysInternals Zoomit application, which has a break timer built in. However, I was teaching a online class, and Zoomit did not seem to get along with WebEx. I decided to write a break timer directly into the PowerPoint slides I was using.

The first step is to create a slide at the end of the presentation that looks like this:


In other words, it is a standard slide with a title at the top and bullet points section below. I centered both and removed the bullet, so it just had text on the time. The code below counts on this slide as being the last in the presentation.

Next I brought up the PowerPoint Visual Basic Editor. You can do this with Alt+F11. Insert a module with Insert > Module from the menu. In the module, add this VBA code:

Option Explicit

Private Declare PtrSafe Sub Sleep Lib "kernel32" (ByVal Milliseconds As Long)
Private lngPreviousSlide As Long
Private boolEndBreak As Boolean

Public Sub BreakTimer()
    Dim dtmStart As Date
    Dim dtmEnd As Date
    Dim slidesCollection As slides
    Dim slideBreak As slide
    Dim lngCurrentSlide As Long
   
    dtmStart = Now
    dtmEnd = DateAdd("n", 10, dtmStart)
   
    Set slidesCollection = Application.ActivePresentation.slides
    Set slideBreak = slidesCollection(slidesCollection.Count)
   
    lngCurrentSlide = SlideShowWindows(1).View.slide.SlideIndex
    If lngCurrentSlide = slidesCollection.Count Then
        'On the break slide, end the break early
        boolEndBreak = True
    Else
        ' Go on break
        lngPreviousSlide = lngCurrentSlide
        boolEndBreak = False
        SlideShowWindows(1).View.GotoSlide slidesCollection.Count, msoTrue
        DoEvents
        Do Until (Now > dtmEnd) Or boolEndBreak
            slideBreak.Shapes(2).TextFrame.TextRange.Text = Format(dtmEnd - Now, "n:ss")
            Sleep 900
            DoEvents
        Loop
        SlideShowWindows(1).View.GotoSlide lngPreviousSlide, msoFalse
    End If
End Sub

When this code run, it remembers the current slide, changes the code to the last slide, and starts a 10 minute countdown (Change the 10 in the DateAdd function to another number to do a different number of minutes in your break).

I then went to the master slide (View > Slide Master) and added a small button in the lower right hand corner. To add a button, you need to have the Developer ribbon turned on. Use File > Options > Customize Ribbon and check the checkbox next to Developer in the dialog and press OK. Then switch to your Developer ribbon.

On the Developer ribbon, Click the Command Button icon, then draw the button on the master slide. Then click the Properties button on the ribbon. Set the name of the button to cmdBreak, and select a clock type image file in the Picture property by hitting the ... button on the right. Then double-click on the button you just created. This creates an Event Handler for the button. In the Event Handler, add this code:

Option Explicit

Private Sub cmdBreak_Click()
    Call BreakTimer
End Sub

Close the Master slide. Run your presentation. Whenever you want to call a break, click the button in the lower right of the current slide. It will jump to your break slide and start counting down. At the end of the break, it will jump back to the slide it was on. If you want to end the break early, on the break slide, click the break button and it will end it (the code is re-entrant, so it can be processing and the button is hit again, which executes it a second time while the first instance is still running).

2019-05-01

Visual Studio 2019 Community has CodeLens

I have been asking for many years in this blog that Visual Studio get CodeLens on the cheaper versions.of Visual Studio. CodeLens shows the number of references to piece of code immediately below the method first line, and quickly allows getting to those references. It is actually configurable, so it can show other information as well, but the reference count is the default.

When Microsoft first made CodeLens available, it was only available on the $12000 version of Visual Studio. It has finally made its way into the Community Edition as of the recent release of Visual Studio 2019. The Community Edition is the version available for free for very small companies, educational, and personal use.

Now if they would make Code Coverage available on the Community Edition, it would make me happy. Code Coverage allows seeing what code has been hit by test suites and where additional tests need to be written. There is the free AxoCover that does pretty well, but having the Microsoft version available would be better. This is my biggest missing feature in the Visual Studio that I use.

2019-01-30

How to Delete an Excessively Long Directory on NTFS

The current version of Windows has some throwbacks to the days of the DOS operating system. Back in the day, DOS had a limit on filenames that they could not be more than 260 or so characters long (there was a little fudging between the limit on directories and filenames, but let's just call it 260).

The current NTFS file system doesn't have that 260 character limit. However, many of the tools that talk to NTFS, like the Windows Explorer and the command line still do have the limit. So if you have a tool that doesn't have the limit, it can create a directory that you cannot delete from the Windows Explorer or the command line. Arg!

The solution is to make the entire directory path shorter than 260 characters, then you can delete the directory. Go to Windows explorer, and drill down into your excessively long directory path until you cannot go any deeper. Then drag that deepest directory you can reach and move it to be a subdirectory of the root (or somewhere much further up the directory tree if the name conflicts). Delete the directory path that you dragged from, which should now be short enough to delete. Then drill down in your new path from the root...you should be able to reach further down than you could before because the limit only applies from the root. Repeat again and again until you can get to the bottom of the tree.

As an additional note: The most common reason for the long directory name problem is that Windows has a bug where it creates a recursive reparsepoint for a directory called "Application Data". This puts the directory as a subdirectory of itself. This means that you can into this subdirectory forever. So if you use a tool like robocopy to copy the directory tree, it will drill down until it hits the NTFS limit on the directory name (much longer than 260) and keep copying the directory. Then you can't delete the directory it copied. To remove a reparsepoint, you can do the following commands from a command prompt:

cd "\users\myacct\appdata\local\application data"
fsutil reparsepoint delete "application data"

2018-08-30

Using the New Features in the Latest Versions of C#

The current version of Visual Studio 2017 (15.8.2 the day this is posted) actually supports C# version 7.3. You can see the new features by looking at the C# feature list. However, by default, Visual Studio will use C# version 7.0. To use versions after 7.0, you will need to go to the project properties, select Build, then click the Advanced button. In the dialog is a setting for Language Version. Changing this to 7.3, for example, will enable the latest features.

You can use this same setting for turning off features. If you don't like the stuff they added to C# version 7, you can go back to 6, or even back to 3. They have been pretty good, however, at not screwing up the language with features added in later versions. I can't think of a feature where I went, "I wish they didn't put that in the language." I think lambda expressions are overused by a lot of people, but there are places where they are appropriate. I also use "var" as little as possible, but there are places where var is necessary and useful. The usage of these features is a coding style issue, not a problem with the language itself.

You can see the features that might be coming in future versions of C# at this page. The biggest feature that is being discussed is non-nullable reference types. With these, you can specify that a specific reference type cannot ever be null. This will likely change how a lot of C# code gets written.

2018-06-10

Using UserControls with Caliburn.Micro

It is common to want to create a reusable UserControl, to be placed into a WPF (Windows Presentation Foundation) screen. This can be done one of two ways:
  • ViewModel First
  • View First
The techniques below will show how to do both of these schemes using Caliburn.Micro to perform the plumbing to connect them up. It took me quite a bit of research to figure out how to make these happen, particularly the View first, scheme. Both of these techniques can be used to create a UserControl in a Window that was itself generated using the other technique. For example, a window that was created using the ViewModel First scheme can include a UserControl that is created using the View First scheme.

In the example code below, the main window View is called  MainWindowView and has a ViewModel called MainWindowViewModel. The ViewModel First control has a ViewModel called ViewModelFirstTestControlViewModel, which is displayed with the View called ViewModelFirstTestControlView. The View First control has a View called ViewFirstTestControlView and has a ViewModel called ViewFirstTestControlViewModel.

The ViewModel first scheme places a ContentControl into the MainWindowView, with a x:Name attribute. For example:

<ContentControl
 x:Name="ViewModelFirstTestControlViewModel" />

The MainWindowViewModel then has this code:

namespace TestSystem.ViewModels
{
 using Caliburn.Micro;
 
 /// <summary>A ViewModel for the main window.</summary>
 /// <seealso cref="T:Caliburn.Micro.PropertyChangedBase"/>
 public class MainWindowViewModel : PropertyChangedBase
 {
  /// <summary>Initializes a new instance of the <see cref="MainWindowViewModel"/> class.</summary>
  public MainWindowViewModel()
  {
   this.ViewModelFirstTestControlViewModel = new ViewModelFirstTestControlViewModel("ViewModel First Set Content");
  }
 
  /// <summary>Gets the ViewModelFirst test control view model.</summary>
  /// <value>The ViewModelFirst test control view model.</value>
  public ViewModelFirstTestControlViewModel ViewModelFirstTestControlViewModel
  {
   get;
   private set;
  }
 }
}

So the constructor of the MainWindowViewModel instantiates the ViewModel of the UserControl, passing any arguments to initialize the values in the control. A property with the same name as the x:Name of the ContentControl exposes that ViewModel to the ContentControl. When the ContentControl needs to display the ViewModel, Caliburn.Micro finds the appropriate View and displays that as the content of the ContentControl.

The content of the actual UserControl View in this example looks like this, but could be virtually anything you want:


<UserControl
 x:Class="TestSystem.Views.ViewModelFirstTestControlView"
 xmlns="http://schemas.microsoft.com/winfx/2006/xaml/presentation"
 xmlns:x="http://schemas.microsoft.com/winfx/2006/xaml">
 <StackPanel
  <TextBlock
   Text="{Binding Path=Caption}" />
 </StackPanel>
</UserControl>

The ViewModel for the control in this example look like this:

namespace TestSystem.ViewModels
{
 using Caliburn.Micro;
 
 /// <summary>A ViewModel for the ViewModelFirst test control. This class cannot be inherited.</summary>
 /// <seealso cref="T:Caliburn.Micro.PropertyChangedBase"/>
 public sealed class ViewModelFirstTestControlViewModel : PropertyChangedBase
 {
  /// <summary>The caption.</summary>
  private string caption = "Default ViewModel first caption";
 
  /// <summary>
  /// Initializes a new instance of the <see cref="ViewModelFirstTestControlViewModel"/> class.</summary>
  public ViewModelFirstTestControlViewModel()
  {
  }
 
  /// <summary>
  /// Initializes a new instance of the <see cref="ViewModelFirstTestControlViewModel"/> class.</summary>
  /// <param name="caption">The caption.</param>
  public ViewModelFirstTestControlViewModel(string caption)
  {
   this.caption = caption;
  }
 
  /// <summary>Gets or sets the caption.</summary>
  /// <value>The caption.</value>
  public string Caption
  {
   get
   {
    return this.caption;
   }
 
   set
   {
    if (value != this.caption)
    {
     this.caption = value;
     this.NotifyOfPropertyChange(() => this.Caption);
    }
   }
  }
 }
}

The main point about the code is that there is a constructor that takes any initial values to be set for the control. You may not actually need the default constructor.

Now, let's examine how to do virtually the same thing, but do it View First. In the MainWindowView, there is this code to place the control into the View:

<ctl:ViewFirstTestControlView
 cm:Bind.Model="TestSystem.ViewModels.ViewFirstTestControlViewModel"
 Caption="View First Set Content" />

For this Xaml to work, two namespace must be defined:

 xmlns:cm="http://www.caliburnproject.org"
 xmlns:ctl="clr-namespace:TestSystem.Views" 

The cm namespace comes from the Caliburn.Micro project. Many people use "cal" instead of "cm", but I've got a namespace for "calendrics" in some of  my projects, so use cm instead. The "ctl" namespace is where your views reside.

The cm:Bind.Model specifies the ViewModel for the control. The Caption passes in the initial value of the control.

This retrieves the View for the control. The View looks very similar the the ViewModel First View, with some additions:

<UserControl
 x:Class="TestSystem.Views.ViewFirstTestControlView"
 xmlns="http://schemas.microsoft.com/winfx/2006/xaml/presentation"
 xmlns:vm="clr-namespace:TestSystem.ViewModels"
 xmlns:x="http://schemas.microsoft.com/winfx/2006/xaml">
 <UserControl.Resources>
  <vm:ViewFirstTestControlViewModel
   x:Key="ViewFirstTestControlViewModel" />
 </UserControl.Resources>
 <StackPanel
  x:Name="root"
  DataContext="{StaticResource ViewFirstTestControlViewModel}">
  <TextBlock
   Text="{Binding Path=Caption}" />
 </StackPanel>
</UserControl>


The additions specify the ViewModel for the control as a resource and binds the DataContext of the first child control to that ViewModel. However, with View First, the thing you can't avoid is having code behind. The code behind for the UserControl looks like this:

namespace TestSystem.Views
{
 using System.Windows.Controls;
 
 using TestSystem.ViewModels;
 
 /// <summary>A view first test control view.</summary>
 /// <seealso cref="T:System.Windows.Controls.UserControl"/>
 /// <seealso cref="T:System.Windows.Markup.IComponentConnector"/>
 public partial class ViewFirstTestControlView : UserControl
 {
  /// <summary>The view model.</summary>
  private ViewFirstTestControlViewModel vm;
 
  /// <summary>Initializes a new instance of the <see cref="ViewFirstTestControlView"/> class.</summary>
  public ViewFirstTestControlView()
  {
   this.InitializeComponent();
   this.vm = (ViewFirstTestControlViewModel)this.root.DataContext;
  }
 
  /// <summary>Gets or sets the caption.</summary>
  /// <value>The caption.</value>
  public string Caption
  {
   get
   {
    return this.vm.Caption;
   }
 
   set
   {
    this.vm.Caption = value;
   }
  }
 }
}

The code behind does the InitializeComponent(), then sets the ViewModel to the DataContext that was set in the view. This, in turn, is used to have the property of the control talk to the ViewModel. The ViewModel of the control looks like this:

namespace TestSystem.ViewModels
{
 using Caliburn.Micro;
 
 /// <summary>A ViewModel for the ViewFirst test control. This class cannot be inherited.</summary>
 /// <seealso cref="T:Caliburn.Micro.PropertyChangedBase"/>
 public sealed class ViewFirstTestControlViewModel : PropertyChangedBase
 {
  /// <summary>The text.</summary>
  private string caption = "Default View first caption";
 
  /// <summary>Gets or sets the text.</summary>
  /// <value>The text.</value>
  public string Caption
  {
   get
   {
    return this.caption;
   }
 
   set
   {
    if (value != this.caption)
    {
     this.caption = value;
     this.NotifyOfPropertyChange(() => this.Caption);
    }
   }
  }
 }
}

This is almost the same as the ViewModel of the ViewModel First control, except it does not need the constructors, since the property is changed from the MainWindowView. (It has a default constructor that does nothing.)

A zip file for the entire project is found here. Included are all the files, including the Caliburn.Micro bootstrapper that sets up the files.

If you know of more efficient ways of doing any of the things I've described, please let me know in the comments.

2018-01-23

Compiling Help File as Part of Visual Studio Solution

I think that Microsoft has dropped the ball on creating help files. The technology has not changed in about 25 years, and was never simple in the first place. The tools are primitive. Furthermore, there is no simple way to incorporate the building of the help file into a Visual Studio solution.

Building a help file is pretty much the same as building a web site. The pages are authored in HTML. The only difference is that there are some supplemental files that tell it how to build the Table of Contents (.hhc file) and the Index (.hhk file) to the help file, as well as a file to tell it what all the all the other files and provide the settings (.hhp file). There is a compiler that compiles the web site into a single .chm file.

To start with, let's go over the tools needed to build a help file. You need the Microsoft HTML Help Workshop. This provides the help compiler (hhc.exe), as well as a rudimentary Windows application for managing the files (hhw.exe). The content files are HTML. If you know HTML well, you can create them in any text editor. Despite knowing HTML backwards and forwards, I still prefer to edit them in an interface that understands HTML as it allows me to reformat the HTML and other features. Microsoft produced a tool for editing HTML that they have since abandoned called Microsoft Expression Web. You can download it for free from the Microsoft web site.

Visual Studio does not have a template that works with help file projects. So we have to kind of fake it out. Create a console application that will act as the help file project. The console application does not need to do anything, as we will be ignoring the compiled executable, and instead using the build events for the project to accomplish what we need.

Use hhw.exe to create the help project. Add HTML files to the project. The stuff below assumes that the name of the .hhp file is HelpProject.hhp, but you can rename it to anything else by making the appropriate changes below.  The HelpProject.hhp should be added to the root of the help project.

Then add compiling the help file to the build events for the console application. However, we have to work around one minor problem: the help compiler returns one on success and zero on failure, rather than the Windows standard of the other way around. Visual Studio considers a build event that returns something non-zero as a failure and terminates the build of the project. To reverse that, we need a short batch file. Add to the help project a file named helpcompiler.bat file that looks like this:

"%ProgramFiles(x86)%\HTML Help Workshop\hhc.exe" %1
if not errorlevel 1 exit /B 1

Then add this to the pre-build event in the Project Properties:

$(ProjectDir)helpcompiler.bat $(ProjectDir)HelpProject.hhp

When the help file compiles, it will produce HelpProject.chm in the same directory as where the HelpProject.hhp file is created. This is the compiled help file that you need. Add a line to the post-build event that copies the HelpProject.chm file to the final location where it is needed. For example:

xcopy /Y $(ProjectDir)HelpProject.chm $(SolutionDir)SomeOtherProject\bin\$(ConfigurationName)

With this hack,  Visual Studio will build the help file and copy it to where it needs to go as part of the build of the Solution.

2017-12-13

Use .editorconfig File to Enforce Coding Conventions

As you may know, I literally wrote the book on C# coding conventions. You can get my book, The Reddick C# Style Guide on Amazon. Since the book was published, C# and Visual Studio have changed a little, as they have added new features to both. There is nothing that I would change in the book, but a few of the new features they added to version 7.x of C# that are not mentioned, such as tuples and pattern matching. Until I can get around to updating the book, there is a nifty feature in Visual Studio 2017 that you can use to enforce what I consider to be the proper coding style for C#.

In the root of your code, add a text file called .editorconfig. The basic format for this file is defined at http://EditorConfig.org. There are specific entries that are understood in Visual Studio 2017, starting with version 15.3, that can be found at https://docs.microsoft.com/en-us/visualstudio/ide/editorconfig-code-style-settings-reference. This is the file that I use, that uses the I consider to be the right style. Even if you don't agree, feel free to use it as a template for your own style.


# http://EditorConfig.org
# https://docs.microsoft.com/en-us/visualstudio/ide/editorconfig-code-style-settings-reference

root=true

[*]
indent_style=tab
indent_size=tab
tab_width=4
end_of_line=crlf
charset=utf-8
trim_trailing_whitespace=true
insert_final_newline=false
max_line_length=140

[*.{cs,vb}]

# "This." and "Me." qualifiers
dotnet_style_qualification_for_field=true:warning
dotnet_style_qualification_for_property=true:warning
dotnet_style_qualification_for_method=true:warning
dotnet_style_qualification_for_event=true:warning

# Language keywords instead of framework type names for type references
dotnet_style_predefined_type_for_locals_parameters_members=true:warning
dotnet_style_predefined_type_for_member_access=true:warning

# Modifier preferences
dotnet_style_require_accessibility_modifiers=always:warning
csharp_preferred_modifier_order=public, private, protected, internal, static, extern, new, virtual, abstract, sealed, override, readonly, unsafe, volatile, async:warning
visual_basic_preferred_modifier_order=Partial, Default, Private, Protected, Public, Friend, NotOverridable, Overridable, MustOverride, Overloads, Overrides, MustInherit, NotInheritable, Static, Shared, Shadows, ReadOnly, WriteOnly, Dim, Const,WithEvents, Widening, Narrowing, Custom, Async:nonewarning

# Expression-level preferences
dotnet_style_object_initializer=true:warning
dotnet_style_collection_initializer=true:warning
dotnet_style_explicit_tuple_names=true:warning
dotnet_style_coalesce_expression=true:warning
dotnet_style_null_propagation=true:warning

# Implicit and explicit types
csharp_style_var_for_built_in_types=false:warning
csharp_style_var_when_type_is_apparent=false:warningn
csharp_style_var_elsewhere=false:warning

# Expression-bodied members
csharp_style_expression_bodied_methods=false:warning
csharp_style_expression_bodied_constructors=false:warning
csharp_style_expression_bodied_operators=false:warning
csharp_style_expression_bodied_properties=false:warning
csharp_style_expression_bodied_indexers=false:warning
csharp_style_expression_bodied_accessors=false:warning

# Inlined variable declarations
csharp_style_inlined_variable_declaration=true:warning

# Pattern matching
csharp_style_pattern_matching_over_is_with_cast_check=true:warning
csharp_style_pattern_matching_over_as_with_null_check=true:warning

# Expression-level preferences
csharp_prefer_simple_default_expression=true:warning
csharp_style_deconstructed_variable_declaration=true:warning
csharp_style_pattern_local_over_anonymous_function=true:warning

# "Null" checking preferences
csharp_style_throw_expression=false:warning
csharp_style_conditional_delegate_call=true:warning

# Code block preferences
csharp_prefer_braces=true:warning

# Organize Usings
dotnet_sort_system_directives_first=true

# Newline Options
csharp_new_line_before_open_brace=all
csharp_new_line_before_else=true
csharp_new_line_before_catch=true
csharp_new_line_before_finally=true
csharp_new_line_before_members_in_object_initializers=true
csharp_new_line_before_members_in_anonymous_types=true
csharp_new_line_between_query_expression_clauses=true

# Indentation Options
csharp_indent_case_contents=true
csharp_indent_switch_labels=true
csharp_indent_labels=flush_left

# Spacing Options
csharp_space_after_cast=false
csharp_space_after_keywords_in_control_flow_statements=true
csharp_space_between_method_declaration_parameter_list_parentheses=false
#csharp_space_between_parentheses=

# Wrapping Options
csharp_preserve_single_line_statements=false
csharp_preserve_single_line_blocks=false

2017-11-21

WPF RibbonSplitButton Activates Twice

On a WPF (Windows Presentation Foundation) RibbonSplitButton there are two parts. There is a button at the top, and a down arrow. The down arrow causes a menu to appear. If you click one of the menu items, there is what I would consider to be a bug, but what Microsoft considers to be "By Design" where it triggers the event code twice. Essentially, it triggers it once for the menu item, and once for the button.

There is a way to handle the problem. Essentially on the first trigger, you need to set the "Handled" property of the RoutedEventArgs to be true. The solution posted on the Microsoft site requires an event handler in code-behind, which isn't compatible with the MVVM architecture. Here is how I handled it using Caliburn.Micro for a button in my application that is supposed to start Excel in one of two different ways. The button at the top executes it with #0, and the two menu items executes it with #1 and #0.

First, here is the XAML. The key part of this is to pass the $executionContext as an argument to the method. This gets the necessary property to where it can be modified.


<ribbon:RibbonSplitButton
 cal:Message.Attach="[Event Click]=[Excel(0, $executionContext)]"
 IsEnabled="{Binding CanExcel}"
 KeyTip="X"
 Label="{x:Static loc:ShellViewResources.Excel}"
 LargeImageSource="/Xoc.MayaCalendar.Windows;component/Assets/Images/Ribbon/ExcelLarge.png"
 SmallImageSource="/Xoc.MayaCalendar.Windows;component/Assets/Images/Ribbon/ExcelSmall.png">
 <ribbon:RibbonMenuItem
  Header="{x:Static loc:ShellViewResources.Excel}"
  ImageSource="/Xoc.MayaCalendar.Windows;component/Assets/Images/Ribbon/PrintSmall.png"
  cal:Message.Attach="[Event Click]=[Excel(1, $executionContext)]" />
 <ribbon:RibbonMenuItem
  Header="{x:Static loc:ShellViewResources.ExcelExample}"
  ImageSource="/Xoc.MayaCalendar.Windows;component/Assets/Images/Ribbon/PrintSmall.png"
  cal:Message.Attach="[Event Click]=[Excel(0, $executionContext)]" />
</ribbon:RibbonSplitButton>

The next part is to handle the event. In the Caliburn.Micro code, it starts with:


public void Excel(ContentLevel contentLevel, ActionExecutionContext executionContext)
{
 RoutedEventArgs routedEventArgs = (RoutedEventArgs)executionContext.EventArgs;
 routedEventArgs.Handled = true;
 // other code
}

This handles the event, which causes it not to cause the second event.

2017-11-02

Do Not Buy Avi-On Light Switches

I bought a GE Avi-On light switch for my daughter's room. This replaces the regular wall switch with one that can be remotely controlled from her phone. The idea was to allow her to turn off the overhead light from the bed. It worked for about 10 minutes until it started downloading a firmware update to the switch, at which point the update failed. The switch no longer works. Lots of people are reporting the same issue, which means there are thousands of these switches throughout the country with this problem.

The Avi-On switches have these problems:

  1. The phone software always requires an internet connection and a login to the Avi-On site. Why? This is a Bluetooth app. There is no reason whatsoever that it needs a connection to a remote network. It only needs a connection between the phone and the switch.
  2. It requires location services turned on and access to the file system on the phone. Why? This just smacks of them just wanting to harvest information from the phone, because there is no need for these permissions. The only thing that would require these accesses is for a firmware update to be downloaded from the network to be pushed to the switch. Which leads to...
  3. The firmware update failed. You cannot push down a firmware update to remote switches if the firmware destroys the switch! And if your testing is abysmal and you somehow screw up and release a bad update, you must pull the firmware update off your site the moment you realize it. People have been reporting that the Avi-On current firmware update is causing problems for the last two months, but they are still pushing out the update.
  4. These switches supposedly make a Bluetooth mesh with other switches in the area to allow spanning past the normal range of Bluetooth. Bluetooth isn't the right technology for home control. The range is too short, which means you either need a huge number of these devices, or you need repeaters about every 33 feet apart. That's an expensive solution to home control. The goal on home control is to have connectivity that ends at the walls of your house, but not before.

In summary, do not buy Avi-On GE Bluetooth light switches, or anything else made by Avi-On Labs. I will be returning this switch to where I bought it.

2017-09-02

Outlook VBA to Move Spam from Top Level Domains to Junk

There is a spammer who has been active for the last couple of months. The majority of my spam email has been coming from the top level domains .trade, .bid, .club, .stream, and .date. I get no legitimate mail from any of those top level domains.

I wrote a VBA routine to go through my inbox and move all email from those domains to my junk folder. It appears below:


Public Sub JunkSpamDomains()
    On Error GoTo ErrorHandler
    Dim mailItem As Outlook.mailItem
    Dim folderInbox As Outlook.folder
    Dim folderJunk As Outlook.folder
    Dim i As Long
    Dim accessor As Outlook.PropertyAccessor
    Dim strHeaders As String
    Dim lngOffset1 As Long
    Dim lngOffset2 As Long
    Dim lngDomainOffset As Long
    Dim strFrom As String
    Dim strDomain As String

    Const PR_TRANSPORT_MESSAGE_HEADERS = "http://schemas.microsoft.com/mapi/proptag/0x007D001E"    Const strBanned As String = ".trade|.bid|.club|.stream|.date"

    Set folderInbox = Application.Session.GetDefaultFolder(olFolderInbox)
    Set folderJunk = Application.Session.GetDefaultFolder(olFolderJunk)
    For Each mailItem In folderInbox.Items
        If mailItem.Class = OlObjectClass.olMail Then
            Set accessor = mailItem.PropertyAccessor
            strHeaders = accessor.GetProperty(PR_TRANSPORT_MESSAGE_HEADERS)
            lngOffset1 = InStr(1, strHeaders, vbCrLf & "From: ") + 8
            lngOffset2 = InStr(lngOffset1, strHeaders, ">")
            strFrom = Mid(strHeaders, lngOffset1, lngOffset2 - lngOffset1)
            lngDomainOffset = InStrRev(strFrom, ".")
            strDomain = Mid(strFrom, lngDomainOffset)
            If InStr(1, strBanned, strDomain) > 0 Then
                mailItem.Move folderJunk
            End If
            Set accessor = Nothing
            Set mailItem = Nothing
        End If
    Next mailItem
    Set folderInbox = Nothing
    Set folderJunk = Nothing
Exit Sub
ErrorHandler:
    Select Case Err.Number
    Case Else
        MsgBox "Unexpected Error #" & Err.Number & " " & Err.Description
        Resume Next
    End Select
End Sub

Press Alt-F11 to open the VBA Editor. Select Insert Module from the menu to insert a new module. Paste this code into the window. You can bind a button on the Quick Access Toolbar (QAT) to this macro. Click the drop-down button on the right of the QAT, and select "More Commands...". Drop the "Choose Commands from:" list and select "Macros". Select "JunkSpamDomains" and click the "Add>>" button. Click the OK button.

After moving message, review the Junk folder to make sure that only spam got moved.

2017-06-03

VBA Runtime Error Codes

I was teaching a VBA (Visual Basic for Applications) class for Excel today, and the question came up, "is there a list of all of the runtime error code numbers and what they mean?" You might be able to find one, but the easiest thing to do is to generate the list. Here is a small piece of VBA code that shows all of the runtime error code numbers and their descriptions.

Public Sub DisplayErrors()
    Dim i As Long
    
    For i = 1 To 65535
        If Error(i) <> "Application-defined or object-defined error" Then
            Debug.Print i & " " & Error(i)
        End If
    Next i
End Sub

When you run the code, it will print the list to the Immediate Window in the VBA Editor. Press Ctrl+G to make the Window visible.

It is possible to get other runtime errors, but only from some component that is called by VBA, not from VBA itself. When I run the code, this is the list that I get:

3 Return without GoSub
5 Invalid procedure call or argument
6 Overflow
7 Out of memory
9 Subscript out of range
10 This array is fixed or temporarily locked
11 Division by zero
13 Type mismatch
14 Out of string space
16 Expression too complex
17 Can't perform requested operation
18 User interrupt occurred
20 Resume without error
28 Out of stack space
35 Sub or Function not defined
47 Too many DLL application clients
48 Error in loading DLL
49 Bad DLL calling convention
51 Internal error
52 Bad file name or number
53 File not found
54 Bad file mode
55 File already open
57 Device I/O error
58 File already exists
59 Bad record length
61 Disk full
62 Input past end of file
63 Bad record number
67 Too many files
68 Device unavailable
70 Permission denied
71 Disk not ready
74 Can't rename with different drive
75 Path/File access error
76 Path not found
91 Object variable or With block variable not set
92 For loop not initialized
93 Invalid pattern string
94 Invalid use of Null
96 Unable to sink events of object because the object is already firing events to the maximum number of event receivers that it supports
97 Can not call friend function on object which is not an instance of defining class
98 A property or method call cannot include a reference to a private object, either as an argument or as a return value
321 Invalid file format
322 Can't create necessary temporary file
325 Invalid format in resource file
380 Invalid property value
381 Invalid property array index
382 Set not supported at runtime
383 Set not supported (read-only property)
385 Need property array index
387 Set not permitted
393 Get not supported at runtime
394 Get not supported (write-only property)
422 Property not found
423 Property or method not found
424 Object required
429 ActiveX component can't create object
430 Class does not support Automation or does not support expected interface
432 File name or class name not found during Automation operation
438 Object doesn't support this property or method
440 Automation error
442 Connection to type library or object library for remote process has been lost. Press OK for dialog to remove reference.
443 Automation object does not have a default value
445 Object doesn't support this action
446 Object doesn't support named arguments
447 Object doesn't support current locale setting
448 Named argument not found
449 Argument not optional
450 Wrong number of arguments or invalid property assignment
451 Property let procedure not defined and property get procedure did not return an object
452 Invalid ordinal
453 Specified DLL function not found
454 Code resource not found
455 Code resource lock error
457 This key is already associated with an element of this collection
458 Variable uses an Automation type not supported in Visual Basic
459 Object or class does not support the set of events
460 Invalid clipboard format
461 Method or data member not found
462 The remote server machine does not exist or is unavailable
463 Class not registered on local machine
481 Invalid picture
482 Printer error
735 Can't save file to TEMP
744 Search text not found
746 Replacements too long

2017-06-01

C# Optimization of Switch Statement with Strings

C# does some interesting things when you have a switch statement comparing a lot of strings: Suppose you have this:

   switch (input)
    {
        case "AAAA":
            Console.WriteLine("AAAA branch");
            break;

        case "BBBB":
            Console.WriteLine("BBBB branch");
            break;

        default:
            Console.WriteLine("default branch");
            break;
    }

    Console.WriteLine("Complete");


When you look at the IL (intermediate language) that it compiles into, it is essentially the same as a bunch of  if and else if statements. Converted back into C# code, it is as if you wrote this:

    if (input == "AAAA")
    {
        Console.WriteLine("AAAA branch");
    }
    else if (input == "BBBB")
    {
        Console.WriteLine("BBBB branch");
    }
    else
    {
        Console.WriteLine("default branch");
    }

    Console.WriteLine("Complete");

 However, if you continue to add case statements, this becomes inefficient. There are a lot of string comparisons that are really expensive. At a certain point, as you add cases, the compiler uses an entirely different technique to handle the cases. It creates a hash table of the strings. The IL looks like this, if it were converted back into C# code (assume there are more case statements):

    string s = input;

    switch (ComputeStringHash(s))
    {
        case 0x25bfaac5:
            if (s == "BBBB")
            {
                Console.WriteLine("BBBB branch");
                goto Label_0186;
            }

            break;

        case 0xff323f9:
            if (s == "AAAA")
            {
                Console.WriteLine("AAAA branch");
                goto Label_0186;
            }

            break;
    }
    Console.WriteLine("default branch");
Label_0186:
    Console.WriteLine("Complete");

The ComputeStringHash method is a pretty simple hash function that looks like this:

    internal static uint ComputeStringHash(string s)
    {
        uint num = 0;

        if (s != null)
        {
            num = 0x811c9dc5;
            for (int i = 0; i < s.Length; i++)
            {
                num = unchecked((s[i] ^ num) * 0x1000193);
            }
        }

        return num;
    }

This is a version of the FNV-1a hashing algorithm.

The change to using hashing seems to occur at about eight string case statements. The advantage is that there will be, on average, just one string comparison, the other comparisons are all comparing uint values. There is some overhead in performing the computing of the hash, which is why it doesn't use it for small number of case statements.

This actually becomes important when you are trying to write unit tests for the code. If you are trying to cover all of the branches in the unit tests, you will need to write code that hashes to 0xff323f9 but is not "AAAA" to get the goto Label_0186 branches to get covered. Your chances of finding something that hashes to the same value as your legitimate "AAAA" string without being "AAAA" is unlikely unless you are specifically trying to get a hash collision. This means that your code coverage will show branches as not being covered, even though you test every case statement in the switch statement. This will show a failure in your code coverage branch statistics (usually around only 60% covered), even though your unit test are actually adequate.

I have been working with the AxoCover and OpenCover programmers to try to get the coverage statistics for branches to be meaningful, but there may be no way to handle this correctly.

Addendum: The logic of the switch statements when it optimizes is slightly more complicated that what is presented above. The C# compiler actually performs a binary search on the hash index rather than just linearly searching through them, before getting to the comparison of the string. Performing hash collisions will raise your coverage to more than 90%, but will not go through all of the code for the binary search.

2017-05-30

How to Convert Project from MSTest (V1) to MSTestV2

To convert a MSTest version 1 project to version 2, you need to perform several steps:

  1. In the project references, remove the reference to Microsoft.VisualStudio.QualityTools.UnitTestFramework.
  2. Edit the project file and remove the line that contains <ProjectTypeGuids>{3AC096D0-A1C2-E12C-1390-A8335801FDAB};{FAE04EC0-301F-11D3-BF4B-00C04F79EFBC}</ProjectTypeGuids>
  3. Add the NuGet package for MSTest.TestAdapter.
  4. Add the NuGet package for MSTest.TestFramework
That should be all that is necessary to make the transition.

2017-05-29

Don't Indicate Status with Just Color


Note: Since this article was written, AxoCover added configuration of colors in the settings dialog. The original point, though, was that you shouldn't indicate status with just color in your own projects.

There is a flaw in the AxoCover code coverage tool: The colors used for coverage, red and green, are hard coded. If someone were red/green color blind, this tool would be difficult to use. That creates difficulty for 8% of men and 0.5% of women. Showing status with hard coded colors with no other visual indicator is a mistake in user interface design, not just in AxoCover but in all programs. Either colors must be configurable, or an additional way of differentiating the colors (such as hatching one of them) should be used.
Status indicated with red and green bars
You'll notice that a traffic stop light indicates color with both red and green, but also with position of the colors; it does not have one light that changes color.
Traffic light uses both color and position to indicate status
Indicating status with just color, particularly red and green, is a very common UI mistake among programmers who are not color blind. While I am not color blind, I try to be aware of places where color is used wrong. This is not just an inconvenience to some people. In some cases, particularly in the United States which has the Americans with Disabilities Act (ADA), using just color to indicate status might be a violation of the law, and could have legal repercussions.

Code Coverage with AxoCover

When performing unit tests on code, how do you know if your unit tests are covering all of the code? The answer is a code coverage tool. I first used a tool like this when I was on the Microsoft Access 1.0 programming team, where we got weekly reports on how well the unit tests were covering the code. Microsoft has a code coverage tool in Visual Studio 2017, but only in the Enterprise edition. Unit tests and code coverage go together, and for Microsoft to have unit tests in the Community and Professional releases but not code coverage is kind of dumb.

Fortunately, there is a pretty competent, free, third party choice called AxoCover. You can download it from the Extensions and Updates menu item on the Tools menu in Visual Studio. It places an AxoCover menu item on the Tools menu that brings up a window to control its use. Build your solution once for AxoCover to figure out what is in there to cover. Then on the AxoCover window, click the Run button at the top. This is what it will look like:

AxoCover window in Visual Studio 2017

The critical information is on the Report tab on the left. After running the tests, AxoCover shows how much of the code got covered by percent. There are two numbers: what percent of lines and what percent of branches got covered. If there is an "if" statement, a test that hits the line counts will result in the line counting 100%, but only if both the true and false conditions are tested will the branches show 100%.
AxoCover report tab
The goal here is to get the branches to over 90%. Why not 100%? In production code, there are sometimes error handling code that can happen in only the rarest of conditions. For example: there may be code to handle if the fixed hard drive that you are writing to fails while the program is running. Sometimes trying to create a unit test for these conditions is difficult or impossible. So in general, greater than 90% is considered covered. Obviously, higher is better, but if all of your code is at 90%, you are doing pretty well. So in the example above, the coverage is 85.7%, which is good, but not good enough.

After running the tests, you can right click on a procedure in the report window and select "Show source". The source will show, with some information on the left border on what was covered and what wasn't.
Code window after running AxoCover
The green bar show lines that were covered by the unit tests. The red bar shows lines that were uncovered. The little circles show if branches were covered. In an "if" statement, you want both circles filled in. In the example above, there needs to be a unit test that covers the case "a" branch of the switch statement. After adding a unit test that covers that statement, go back to the Tests tab, build and run the tests. The report tab, then looks like this:

AxoCover report after adding new test case
Here, the coverage is perfect.

If there is one thing lacking on AxoCover, it's the documentation. The Settings tab has pretty much all of the documentation that exists.

AxoCover is really just a UI that integrate into Visual Studio. The engine that drives the code coverage is a different open source project called OpenCover, that has a command-line only interface. OpenCover is installed automatically when you install AxoCover.